If you break the look and feel of the app when you switch apps on mobile, and you use styles as DynamicResources, which you add as MergedDictionaries in App.Xaml, you should pay attention to this:
When you don’t exit the Android app, but bring it back to the foreground after a very long time, the constructor logic in App.xaml.cs runs again. Don’t forget to add MergedDictionary from code, which contains the styles. If you forget this, all controls will appear in the app with their default look.
This content has 2 years. Some of the information in this post may be out of date or no longer work. Please, read this page keeping its age in your mind.
If calling ResourceManager.GetResource(“resourceName”) doesn’t work because the framework doesn’t return the resource you want, you can bypass it with the following code snippet:
I used this code snippet to set a custom push notification sound
This content has 2 years. Some of the information in this post may be out of date or no longer work. Please, read this page keeping its age in your mind.
If you are experiencing white screen when pushing to Navigation or Modal stack on Android, read on.
I’m not sure is this a bug in Xamarin Forms or not, but I guess this is, because it comes only in certain scenarios, and not always.
What is happening, how do you notice this error?
You have got a NavigationPage. You are pushing a new page to the navigationstack, and the page is not getting rendered, only a blank white screen displays.
If you are rotating the device, the page is getting rendered well.
My environment was: Xamarin.Forms: 4.8 up to 5.0 Device: Samsung Galaxy A12 Visual Studio 2019 Professional with Xamarin.Android SDK 11.4.0.5
Solution
Always invoke the INavigation’s methods on the applications Main Thread. UI changes must go always on the UI thread of the application.
Create a class which wraps the INavigation presented by your Views. It’s handy to store a reference in this class to the Applications Current MainPage’s INavigation instance, so try to build your code to supply the actual INavigation Instance every time to this class when the application’s mainpage is set.
Consider a check for the current thread in the methods body. If they are being executed in the main thread, you won’t need to switch to the main again.
This content has 3 years. Some of the information in this post may be out of date or no longer work. Please, read this page keeping its age in your mind.
If you haven’t seen part 1, click here, and start build up your CI/CD pipeline now.
Part 2 Contains:
Configuring build with creating signed APK, and making artifacts from it
Setting up branch policy to master
Configure some magic
Let’s go back to Pipelines. Edit your previously created pipeline by clicking the three dot on the pipelines row.
Edit the previously created pipeline
CI is based on cloud machines hosted somewhere over the world. This computers called as agents. They are used to follow your instructions, defined in the yml file. The base Xamarin.Android yml is only to build your code. But we will make some additional steps in order to create a signed APK of every build. Follow up, to complete this setup.
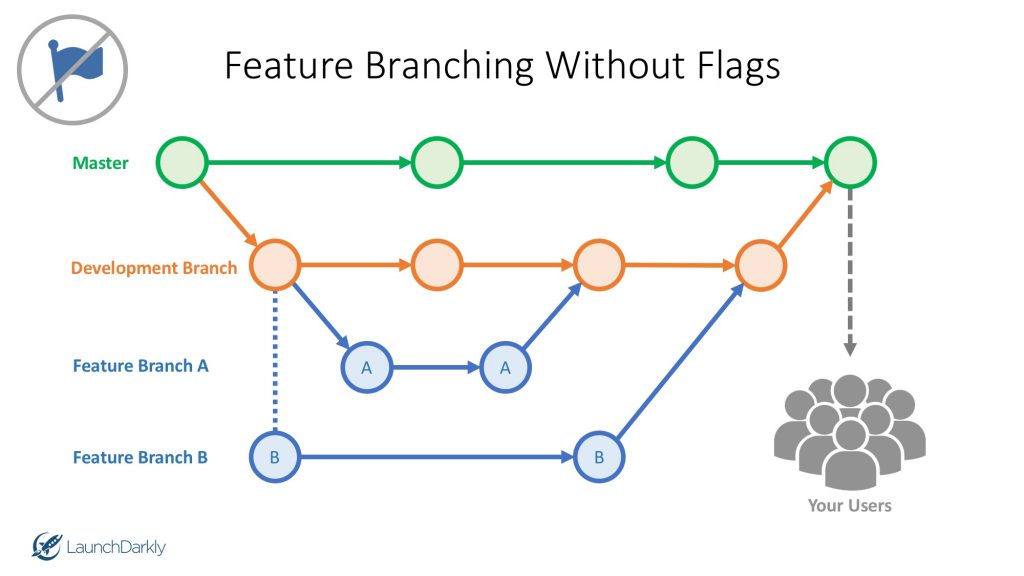
Recommended branching strategy for this is to keep a development branch, and pull request your feature branches to it, and finally pull request the development branch to the master, and keep your master is always at your production version. The figure below shows visually this method. Source: https://dzone.com/articles/feature-branching-using-feature-flags-1
First, set up some variables for this pipeline. You will find a Variables button on the right top of the tab. Click on it.
Add variables with new variable button
Let’s add a new variable by clicking the “New variable” button. We will need 4 vars.
Adding a new variable.
Remember, that i told you, you will need to remember the alias, password, and the keystore name? You can forget them, after you have declared the variables for them.
Variables needed:
keystore_filename - AnAwesomeAppDelivery.keystore
keystore_alias - AnAwesomeAppDelivery
keystore_password - The password of the keystore.
When you create var for keystore_password, tick the “Keep this value secret” checkbox.
Go to the end of the boilerplate YAML file, and on the right top of the text editor, you can see a task wizard button. Click on that.
Search for “Download secure file” task on the search bar. Click on it, and set the “Secure file” to the value below, and click on “Add”.
$(keystore_filename)
This will get the variable value defined above. Press some enters to seperate our next task from the download secure file task, and jump into signing the APK.
Search for “Android signing” in tasks.
Android signing task
And set up the task like on the picture below. Please regret me for messing up the “Key password” value in the screenshot, the $(keystore_password) variable goes in that field too.
Setting up Android signing task
If everything set up correctly, it will make our APK in the output directory signed. But how we will access it? We need to drop our result to the pipeline artifacts. You can set the build output to the artifact staging directory, but i recommend to only copy the file, that you will need as a result. So make a copy task after Adding the Sign task, and some enters to the end of the YAML file. Follow the configurations in the picture.
We will copy every file with APK extension, from the output directory to the ArtifactStagingDirectory.
Okay, we have copied the files, but the files wont appear in Azure DevOps, until we drop our packages to the Artifacts section of our build. Search for “Publish build artifacts”, select the task, and configure as the image below.
Finally creating the result to be ready to download
So how our YAML Looks like now? Like this below? Then go and save it. If not, correct your mistakes.
How your YAML file supposed to look like
After saving the YAML, it recommends to Run it, so jump right into the fun, click on the “Run” button.
The build is running, and creating us the binaries.
If everything is correct, it will show only green ticks. When you click on “Pipelines/pipelines” in the left menu of the DevOps page, you will see your state of your build. On the detailed view, you can access the created artifacts in order to download them.
Of course, a success build for the first try.. 😀
Click on the row, and you can access the details of the build. If you have set up the pipeline correctly, it will show “1 published” label. Click on it, and you can access your signed application binary.
1 published
The signed APK
Merge the pipeline config branch to master
Create a pull request to master.
Set up main branch policies to run CI automatically
Go to Repos/Branches, and select the main branch, click on the three dot in the end of the row, and select “Branch policies”.
Add a build policy to the branch.
In the Build validation option, you can configure the previously created pipeline to run automatically whenever a new pull request gets accepted.
This content has 3 years. Some of the information in this post may be out of date or no longer work. Please, read this page keeping its age in your mind.
This tutorial will drive you through setting up a great CI/CD pipeline for Xamarin Android in a fully hosted Azure DevOps enviroment.
Part 1 contains:
Creating an empty Xamarin.Android build pipeline
Uploading keystore file to secure files
Start with some code
An Initial repository
I have added some basic code to my demo repository. It is a boilerplate Xamarin Application, with no additional customized code. If you have code in your repo, make sure it builds successfully.
Create your first pipeline
On the left side menu, go to Pipelines/Pipelines. This menu will show up a welcome page, to create new pipeline.
Let’s do it!
Click on ‘Create Pipeline’ button, or if you have already created your first pipeline, find a button to add a new one.
On the next page, a wizard will guide you through the basic setup.
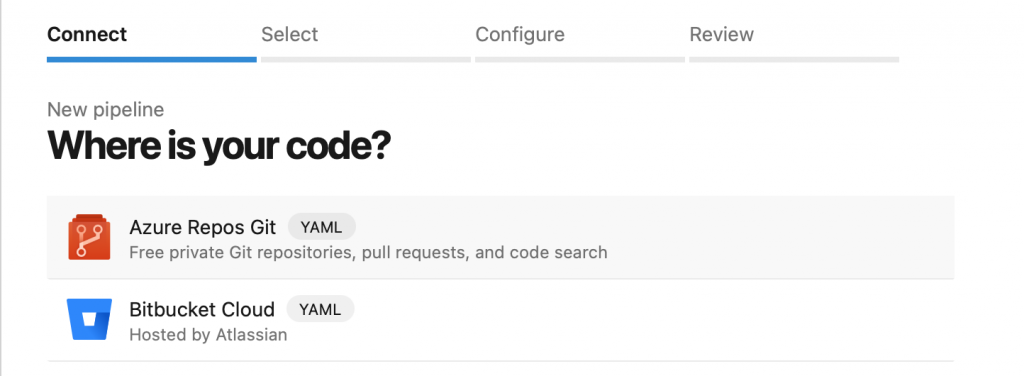
Point for your repository
If you have your code in Azure Repos, click the button for that.
Select your repo
Select your repository where your Xamarin Android code lives.
Select Xamarin.Android Template
On the next page, you can select a template to create your pipeline yml. Let’s choose Xamarin.Android.
Rename your yml file if you want
If you want, you can rename your yml file. Pipeline files will be placed in your repository root by default. YML file extension stands for YAML files. Review your newly created file, how it looks like. Luckily, you do not have to write yaml too much, but good to know, how it markups the build process.
Lets save the YAML
Okay it is enough for now, we have some things to do outside of the pipeline editor. Go save your configuration.
Create a new branch for that
Create a new branch for the pipeline setup with name like pipeline_configuration. You can directly push the config to the main branch, but in this step of the tutorial, i recommend to create a branch for that. Later on, we will set branch policies 😉
Store your app signing key securely
Your app signing key is a very important file to keep your binaries trusted for your users. You can provide with signing, that the binary has been built by you, and not by a bad guy. Keeping this file secure is a must have thing.
Azure DevOps pipelines have a library function, where you can store your custom agent connection settings, and files needed to build or sign your applications securely.
Jump to library
Let’s jump into library menu. Select secure files option, and upload your keystore file.
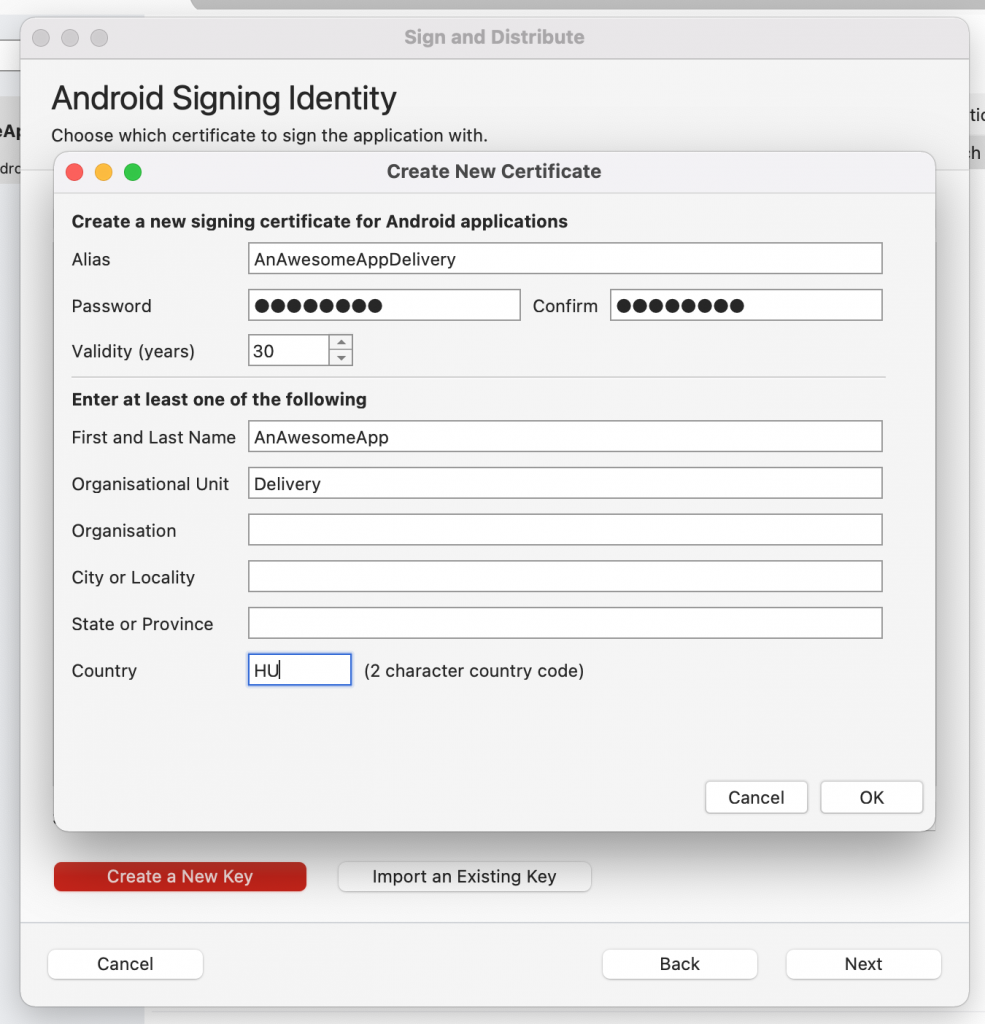
Creating a keystore in Visual Studio for Mac
If you do not have a keystore, you can create a new one when you are trying to publish a Xamarin.Android application as AdHoc. Keep your Alias, Password in mind, you will need this in the future.
Location of release keystores on Mac
The location of the release keystores on Mac is:
~/Library/Developer/Xamarin/Keystore/
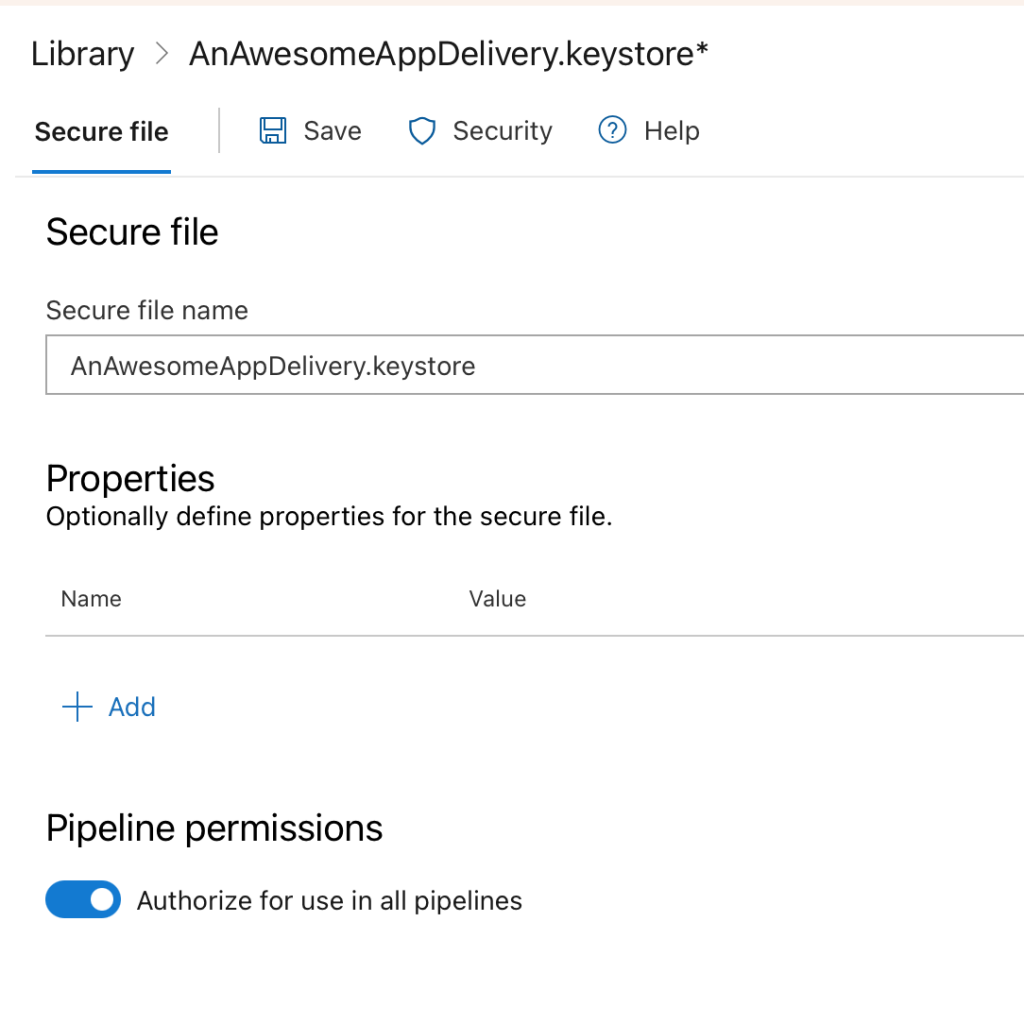
Once, you have uploaded your keystore to the secure file storage, you need to set the permissions, to pipelines in order to access your secure files. Note your secure file filename, you will need this too in the future. Click the three dots on the uploaded file, and select edit.
Set permissions for pipelines
Check the pipeline permissions checkbox, and save your file.
In the next session
We will continue set up CI to our Android project.
Go to Part 2 to continue configuring your repository
This content has 3 years. Some of the information in this post may be out of date or no longer work. Please, read this page keeping its age in your mind.