
This tutorial will drive you through setting up a great CI/CD pipeline for Xamarin Android in a fully hosted Azure DevOps enviroment.
Part 1 contains:
- Creating an empty Xamarin.Android build pipeline
- Uploading keystore file to secure files
Start with some code

I have added some basic code to my demo repository. It is a boilerplate Xamarin Application, with no additional customized code. If you have code in your repo, make sure it builds successfully.
Create your first pipeline
On the left side menu, go to Pipelines/Pipelines. This menu will show up a welcome page, to create new pipeline.

Click on ‘Create Pipeline’ button, or if you have already created your first pipeline, find a button to add a new one.
On the next page, a wizard will guide you through the basic setup.
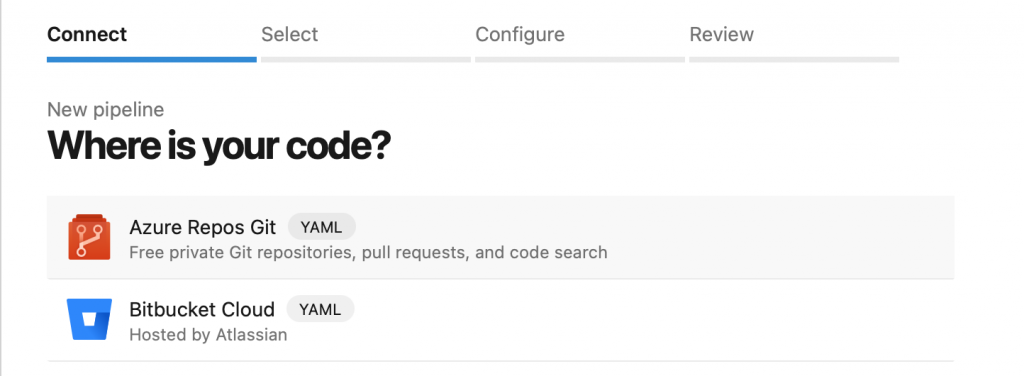
If you have your code in Azure Repos, click the button for that.

Select your repository where your Xamarin Android code lives.

On the next page, you can select a template to create your pipeline yml. Let’s choose Xamarin.Android.

If you want, you can rename your yml file. Pipeline files will be placed in your repository root by default. YML file extension stands for YAML files. Review your newly created file, how it looks like. Luckily, you do not have to write yaml too much, but good to know, how it markups the build process.

Okay it is enough for now, we have some things to do outside of the pipeline editor. Go save your configuration.
Create a new branch for the pipeline setup with name like pipeline_configuration. You can directly push the config to the main branch, but in this step of the tutorial, i recommend to create a branch for that. Later on, we will set branch policies 😉
Store your app signing key securely
Your app signing key is a very important file to keep your binaries trusted for your users. You can provide with signing, that the binary has been built by you, and not by a bad guy. Keeping this file secure is a must have thing.
Azure DevOps pipelines have a library function, where you can store your custom agent connection settings, and files needed to build or sign your applications securely.

Let’s jump into library menu. Select secure files option, and upload your keystore file.
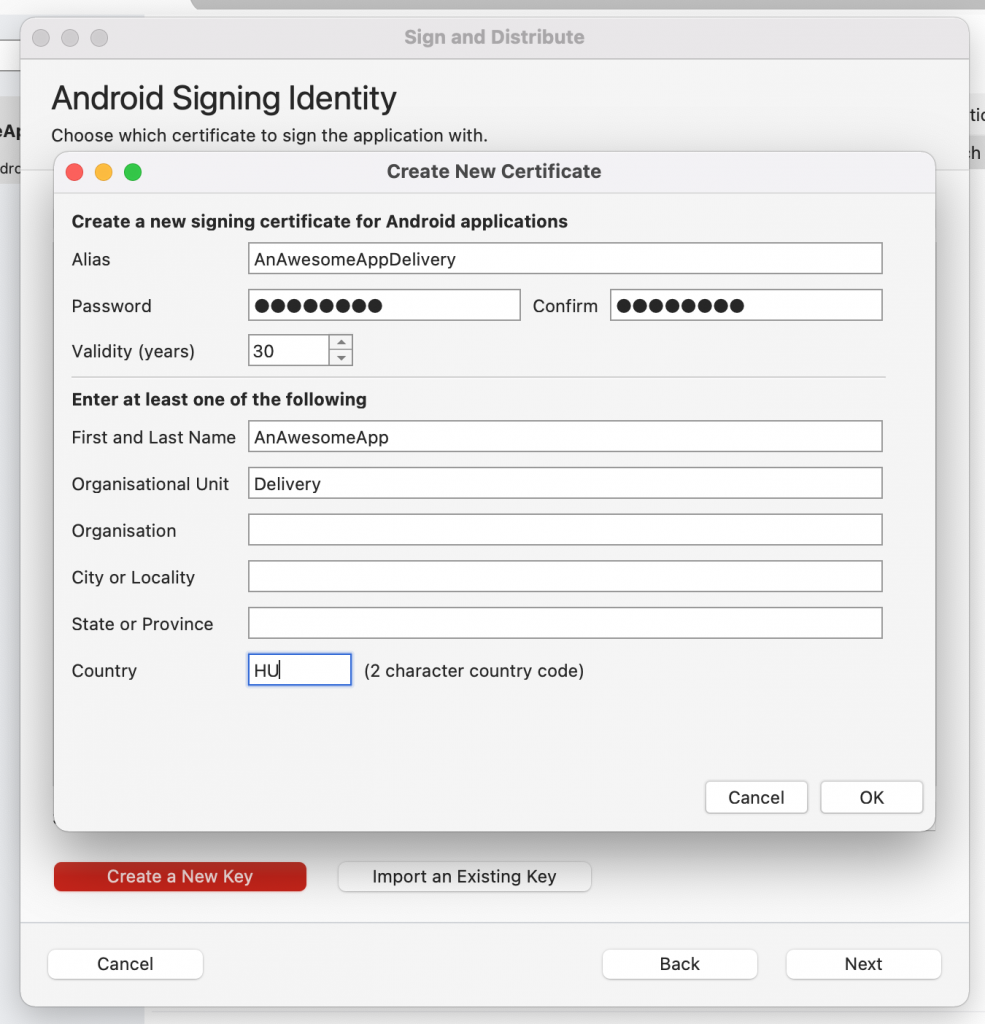
If you do not have a keystore, you can create a new one when you are trying to publish a Xamarin.Android application as AdHoc. Keep your Alias, Password in mind, you will need this in the future.

The location of the release keystores on Mac is:
~/Library/Developer/Xamarin/Keystore/
Once, you have uploaded your keystore to the secure file storage, you need to set the permissions, to pipelines in order to access your secure files. Note your secure file filename, you will need this too in the future. Click the three dots on the uploaded file, and select edit.
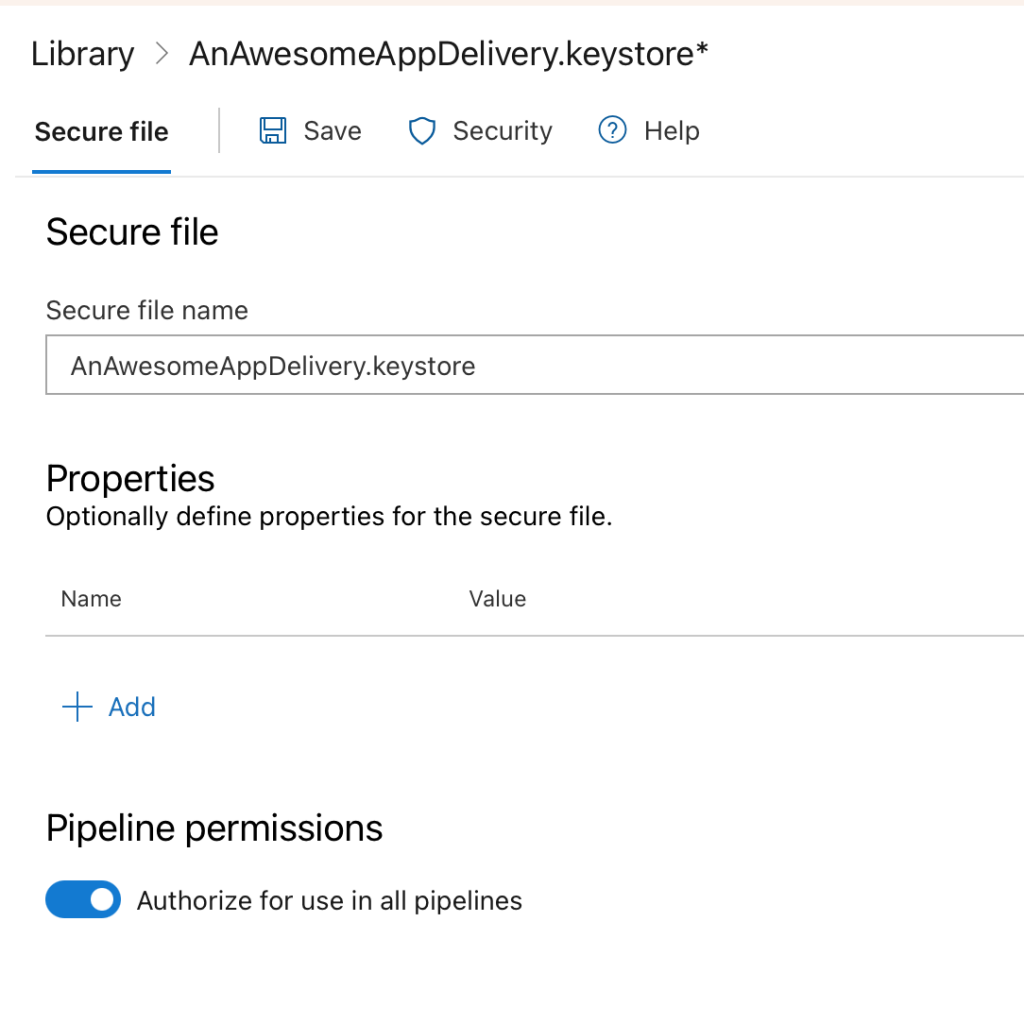
Check the pipeline permissions checkbox, and save your file.
In the next session
We will continue set up CI to our Android project.
Go to Part 2 to continue configuring your repository