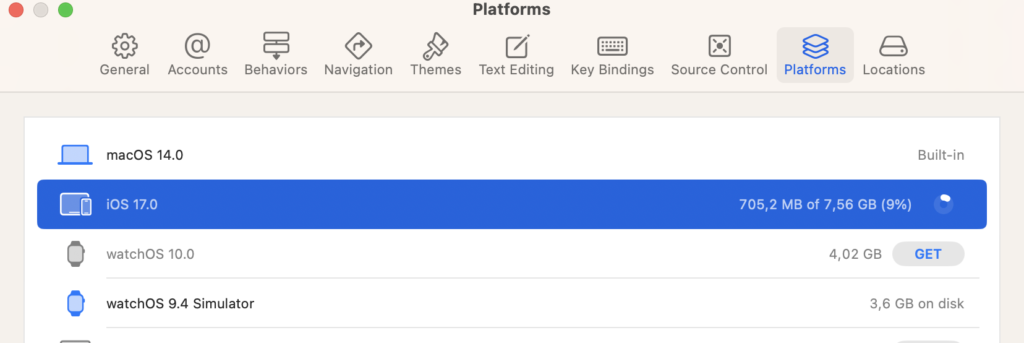
.NET MAUI + Visual Studio Code: Debugging Cancelled: XCode Not Found

One common issue users face is the “Debugging Cancelled: XCode Not Found” error on macOS. In this blog post, we’ll explore a step-by-step guide to troubleshoot and resolve this vexing problem.

Solution 1: Verify VS Code Command Line Tools Installation
Before diving into complex solutions, let’s start with the basics. Ensure that the VS Code command line tools are correctly installed on your machine. Run the following command in the terminal:

xcode-select --install

This command installs the necessary tools for XCode. After installation, verify that the path is correctly set by running:

xcode-select -p

Ensure that the path points to your XCode installation. If not, set it using the following command:

sudo xcode-select -s /Applications/Xcode.app/Contents/Developer

Solution 2: Force Quit and Relaunch VS Code
Sometimes, issues can be resolved by simply force quitting VS Code and relaunching it. This action ensures a fresh start, eliminating any temporary glitches that might be causing the problem.

Solution 3: Restart VS Code
A restart can work wonders in resolving software-related issues. Save your work, close VS Code, and then relaunch it. This simple step can refresh the IDE and might solve the “Debugging Cancelled: XCode Not Found” issue.

Solution 4: Reinstall .NET MAUI Extension
If the problem persists, the next step is to reinstall the .NET MAUI extension. Extensions can occasionally become corrupted or outdated, leading to compatibility issues. Open the Extensions view in VS Code, locate the .NET MAUI extension, and uninstall it. Afterward, reinstall the latest version from the Visual Studio Code marketplace.

Solution 5: Reinstall Visual Studio Code
If all else fails, consider reinstalling Visual Studio Code. Uninstall the current version, download the latest version from the official website, and perform a clean installation. This ensures that any corrupted files or configurations are completely removed, and you start with a fresh setup.

This content has 10 months. Some of the information in this post may be out of date or no longer work. Please, read this page keeping its age in your mind.

.NET MAUI – One or more invalid file names were detected.

Developers working on .NET MAUI projects may encounter a perplexing error during the build process, revealing invalid file names that must adhere to specific rules.

/usr/local/share/dotnet/packs/Microsoft.Maui.Resizetizer.Sdk/7.0.101/targets/Microsoft.Maui.Resizetizer.targets(525,9): error : One or more invalid file names were detected. File names must be lowercase, start and end with a letter character, and contain only alphanumeric characters orunderscores.

The Solution

To resolve this issue, developers need to identify and correct the problematic file names. On macOS, the hidden file .DS_Store is a common culprit causing this error. Here’s a step-by-step guide to resolving the issue:

For macOS

  1. Open Finder.
  2. Navigate to the root directory of your project.
  3. Press Command + Shift + Period to toggle the visibility of hidden files.
  4. Look for any hidden files, particularly .DS_Store.
  5. Delete or rename the problematic hidden files.

If the Finder app does not show any files, try opening a terminal, navigate to the resources folder of your project, and type ls -la to see the files. It should display the invalid files. Remove them accordingly.

For Windows

  1. Open File Explorer.
  2. Navigate to the root directory of your project.
  3. Select the “View” tab on the File Explorer ribbon.
  4. Check the “Hidden items” option in the “Show/hide” group.
  5. Look for any hidden files, and particularly check for files similar to .DS_Store (Windows might have different hidden files causing the issue).
  6. Delete or rename the problematic hidden files.
This content has 10 months. Some of the information in this post may be out of date or no longer work. Please, read this page keeping its age in your mind.

.NET MAUI Android Auto : Launching Navigation Apps from your app

Android Auto is a popular platform that allows users to seamlessly integrate their Android devices with their car’s infotainment system. This integration extends to navigation, allowing users to launch navigation apps like Google Maps or Waze directly from Android Auto. In this blog post, we’ll explore how to achieve this functionality from within your Android application using .NET MAUI.

The key to launching navigation apps on Android Auto is to construct a URI with the desired latitude and longitude and use an Intent to open the navigation app. Let’s break down the code snippet you provided to understand how it works:

public class NavigationOnClickListener : Java.Lang.Object, IOnClickListener
{
    private readonly CarContext _context;
    private readonly double _latitude;
    private readonly double _longitude;

    public NavigationOnClickListener(CarContext context, double latitude, double longitude)
    {
        _context = context;
        _latitude = latitude;
        _longitude = longitude;
    }

    public void OnClick()
    {
        string uri = $"geo:{_latitude.ToString(CultureInfo.InvariantCulture)},{_longitude.ToString(CultureInfo.InvariantCulture)}";
        Intent intent = new Intent(CarContext.ActionNavigate)
            .SetData(AndroidUri.Parse(uri));
        _context.StartCarApp(intent);
    }
}

AndroidUri is the Android.Net.Uri class alias achieved by:

using AndroidUri = Android.Net.Uri;

Let’s dissect this code step by step:

  1. NavigationOnClickListener is a custom class that implements the IOnClickListener interface. This class is responsible for handling the click event that launches the navigation app.
  2. In the constructor, we receive three parameters: context, latitude, and longitude. context is the CarContext instance, and latitude and longitude are the destination coordinates (double).
  3. Inside the OnClick method, we construct a URI in the following format: "geo:latitude,longitude". The CultureInfo.InvariantCulture is used to ensure that the decimal separator is a period (.) rather than a comma (,) to make the URI universally compatible. This is crucial because different regions may use different formats for numbers.
  4. We create an Intent with the action CarContext.ActionNavigate. This action specifies that we want to launch a navigation app.
  5. We set the data of the intent by parsing the constructed URI using AndroidUri.Parse(uri).
  6. Finally, we start the navigation app by invoking _context.StartCarApp(intent).
This content has 11 months. Some of the information in this post may be out of date or no longer work. Please, read this page keeping its age in your mind.

.NET MAUI Android Auto: Async loading of lists

Android Auto has become an integral part of the modern driving experience, allowing users to access important information and features without taking their eyes off the road. In this blog post, we’ll explore how to implement asynchronous loading of lists in Android Auto to ensure a smooth and responsive user experience.

If you are new how to implement Android Auto in your .NET MAUI Application, then scroll to the very end of this post, and you will find a detailed tutorial video by Christian Strydom how to do it.

Implementation

Let’s assume that we have a class with a list of SomeObject named _allItems.
This list contains the data we want to display in an Android Auto list. If you dont have this private field of List<SomeObject> in your Android Auto Screen class, then define it like this: ‘private List<SomeObject> _allItems;’

We’ll use the OnGetTemplate method to check whether _allItems has data. If it doesn’t, we’ll start an asynchronous task to load the data and show a loading indicator. If it does, we’ll build the list with the existing data.

OnGetTemplate modify

In the OnGetTemplate method, we’ll first create a ListTemplateBuilder and check if _allItems has data:

public override ITemplate OnGetTemplate()
{
    var listTemplateBuilder = new ListTemplate.Builder();

    if (_allItems?.Any() != true)
    {
        // Start an async task to load data
        _ = LoadData();

        // Show a loading indicator
        return listTemplateBuilder.SetLoading(true).Build();
    }
    
    // Build the list using the existing data
    var items = BuildListItems(_allItems);
    listTemplateBuilder.AddItems(items);

    return listTemplateBuilder.Build();
}

Implement the Async Task

Now, let’s create an asynchronous task, LoadDataAsyncTask, which will invoke a method asynchronously to fetch and set the value of _allItems. We will use a hypothetical API call as an example:

    private async Task LoadData()
    {
        try
        {
            // Perform an asynchronous operation (e.g., an API call)
            var result = await SomeApiCallAsync(); // Replace with your actual API call

            // Set the value of _allItems with the result
            _allItems = result;
        }
        catch (Exception e)
        {
            // Handle exceptions and show a CarToast
            CarToast.MakeCarToast(CarContext , "An error occurred", CarToast.DurationLong).Show();
        }
        finally
        {
            // Ensure that the UI is invalidated
            // This will trigger the OnGetTemplate again.
            Invalidate();
        }
    }

Implementing asynchronous loading of lists in Android Auto ensures that your app remains responsive and user-friendly. By following this approach, you can fetch and display data efficiently, handle exceptions gracefully, and maintain a smooth user experience while driving. Android Auto provides a powerful platform for developers to create safe and engaging automotive experiences, and proper asynchronous loading is a key part of that experience.

This content has 11 months. Some of the information in this post may be out of date or no longer work. Please, read this page keeping its age in your mind.

.NET MAUI Android Error: Type androidx.collection.ArrayMapKit is defined multiple times

One common challenge is AndroidX dependency conflicts. In this blog post, we’ll guide you through resolving compilation errors related to AndroidX in .NET MAUI. Before we proceed, let’s take a look at the error message that may have troubled you:

/Users/Username/Documents/src/ProjectFolder/Project: Error JAVA0000: Error in /Users/Username/.nuget/packages/xamarin.androidx.collection.jvm/1.3.0.1/buildTransitive/net6.0-android31.0/../../jar/androidx.collection.collection-jvm.jar:androidx/collection/ArrayMapKt.class:
Type androidx.collection.ArrayMapKt is defined multiple times: /Users/Username/.nuget/packages/xamarin.androidx.collection.jvm/1.3.0.1/buildTransitive/net6.0-android31.0/../../jar/androidx.collection.collection-jvm.jar:androidx/collection/ArrayMapKt.class, /Users/Username/.nuget/packages/xamarin.androidx.collection.ktx/1.2.0.5/buildTransitive/net6.0-android31.0/../../jar/androidx.collection.collection-ktx.jar:androidx/collection/ArrayMapKt.class
Compilation failed
java.lang.RuntimeException: com.android.tools.r8.CompilationFailedException: Compilation failed to complete, origin: /Users/Username/.nuget/packages/xamarin.androidx.collection.jvm/1.3.0.1/buildTransitive/net6.0-android31.0/../../jar/androidx.collection.collection-jvm.jar
androidx/collection/ArrayMapKt.class

In my case the meaning of this error message is: Type androidx.collection.ArrayMapKt is defined multiple times

Examine Dependencies and Manually Delete bin and obj Folders:

Start by inspecting your project’s dependencies. Ensure that you have the same versions of .NET MAUI packages and other libraries. Dependency mismatches can often lead to compilation errors.

Sometimes, cleaning your project isn’t enough.
To ensure a fresh build, you might need to manually delete the bin and obj folders. You can find these folders in your project directory. They contain build artifacts and removing them helps clear cached data.

Verify NuGet Packages:

Review your NuGet packages. Look out for multiple versions of the same library, as this can lead to conflicts. If you find any conflicting packages, remove the outdated or conflicting versions. You may need to edit your project’s .csproj file to resolve these package issues.

Additionally, if you’ve recently installed a new NuGet package with has an Android dependency, make sure you have the correct version. A different version might introduce incompatibilities with the already installed pacakages.

This content has 11 months. Some of the information in this post may be out of date or no longer work. Please, read this page keeping its age in your mind.